
Ever wondered how a simple thread transforms into an exquisite embroidery piece that breathes life into your fabrics? Today, we’re pulling back the curtains and taking you on a journey – from the humble thread to the final masterpiece. Sit tight, grab a cup of tea, and get ready for a whirlwind tour of the magical world of embroidery production!
Step 1: The Inspiration
Embroidery – an ancient craft that has breathed life into fabrics for centuries. A textile art that tells tales of culture, heritage, passion, and inspiration. But what inspires embroidery, this delicate dance of thread on cloth? Let’s unravel this thread of thought.
Embroidery is an ever-evolving art form that draws inspiration from various facets of life. In its vast tapestry, one can find threads of nature, culture, history, spirituality, personal experiences, and even the collective unconscious.
Nature’s Embroidery:
Nature, in all her glorious diversity, has always been a rich source of inspiration for embroidery designs. A simple bloom of a rose, a peacock flaunting its iridescent plumage, the intricate patterns on a butterfly’s wings, the flowing grace of a river – all have been immortalized in the stitches of embroidery. Nature’s kaleidoscope of colors, forms, and patterns provide an endless palette for the artist’s needle, allowing them to capture the essence of the natural world in the threads of their craft.
Historical Threads:
History, too, leaves its indelible imprint on embroidery. Each era brings forth its own distinctive style, influenced by its cultural, political, and social contexts. From the royal courts of ancient Egypt to the aristocratic salons of Victorian England, embroidery has been used as a way to showcase status, power, and wealth. Historic events, mythologies, and popular motifs of the time often find their way into the fabric, creating a textured narrative of the times.
A Stitch in Spirituality:
In many cultures, embroidery is not just a decorative art form but also a deeply spiritual practice. In some traditions, specific patterns and symbols are believed to attract positive energies or ward off evil. The very act of stitching can be a meditative process, allowing the artisan to connect with their inner self and the larger universe.
Personal Tales:
On a more personal level, embroidery often reflects the individual’s experiences, emotions, and dreams. It is a medium of self-expression, allowing the artist to weave their stories, hopes, and aspirations into the fabric. A piece of embroidery can often serve as a deeply personal diary, stitched in colorful threads and intricate patterns.
Threads of the Collective Unconscious:
Finally, the inspiration for embroidery can come from the collective unconscious – a reservoir of experiences, symbols, and archetypes shared by humanity across cultures and time. These universal patterns and motifs resonate with our deepest psyche, lending a profound depth and meaning to the embroidered piece.
In conclusion, the inspiration behind each embroidered piece is as intricate and diverse as the stitches themselves. It’s a testament to the artisan’s ability to draw from the world around them and within them, and translate it into a language of thread and fabric. A language that speaks of beauty, creativity, and an unbroken connection to our roots and our surroundings. It’s a celebration of life, stitched into every thread, every pattern, every color. Such is the inspiring world of embroidery!

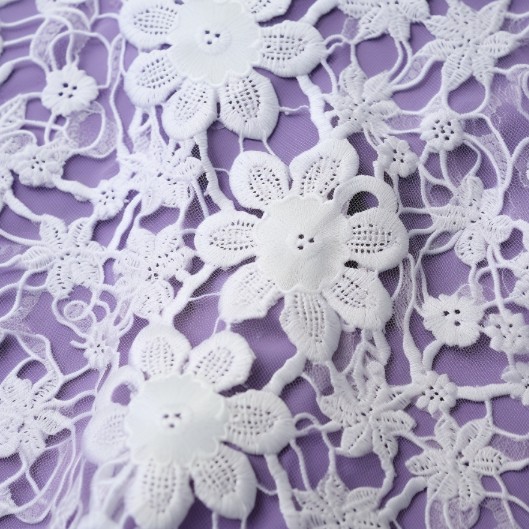
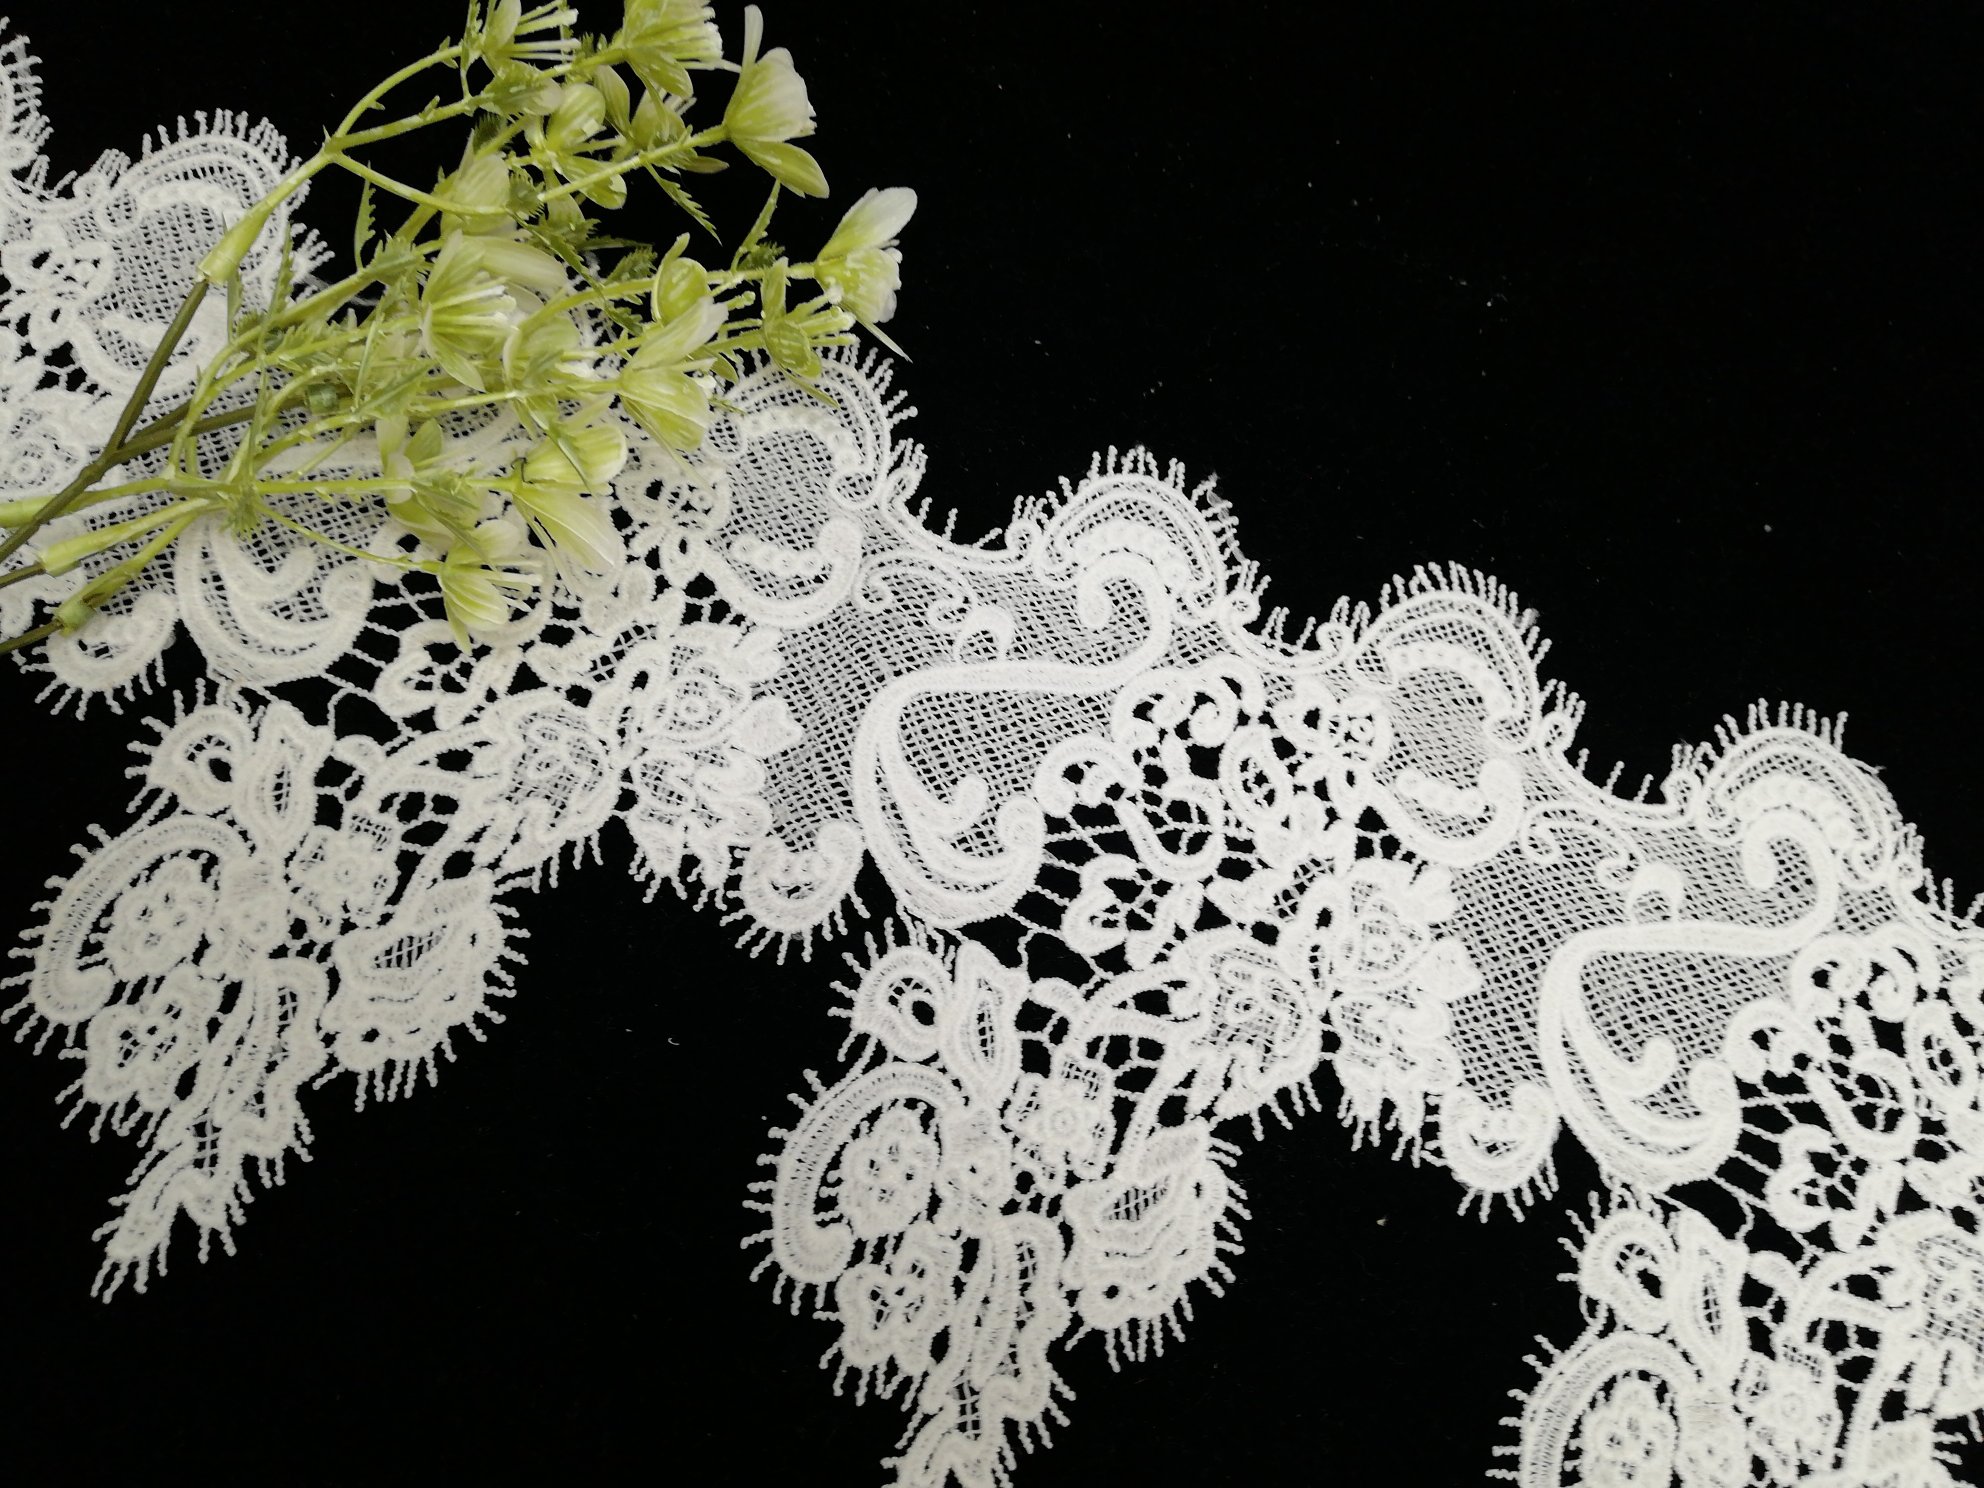
Inspiration meets nature

Inspiration meets nature
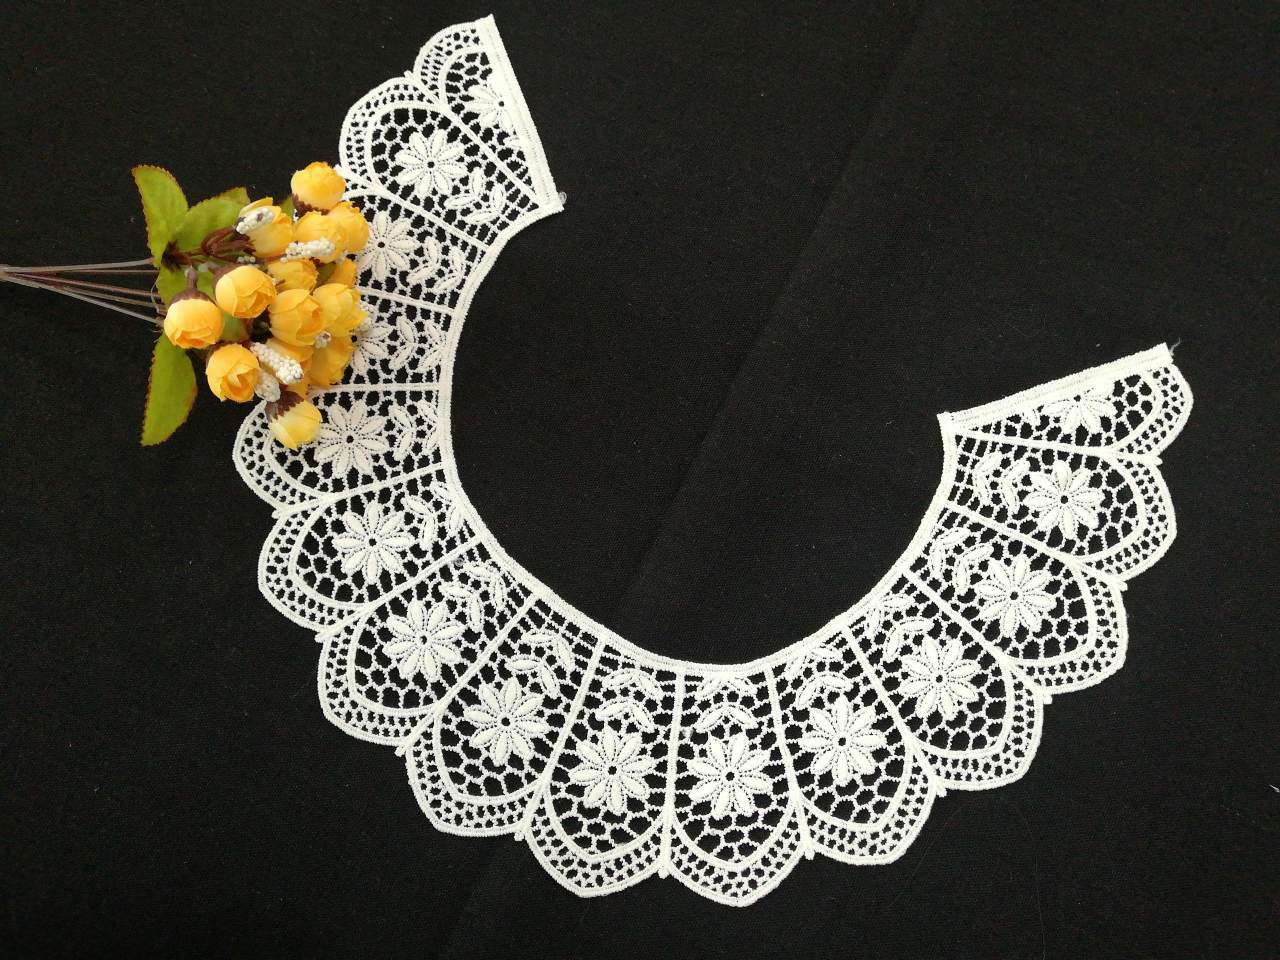
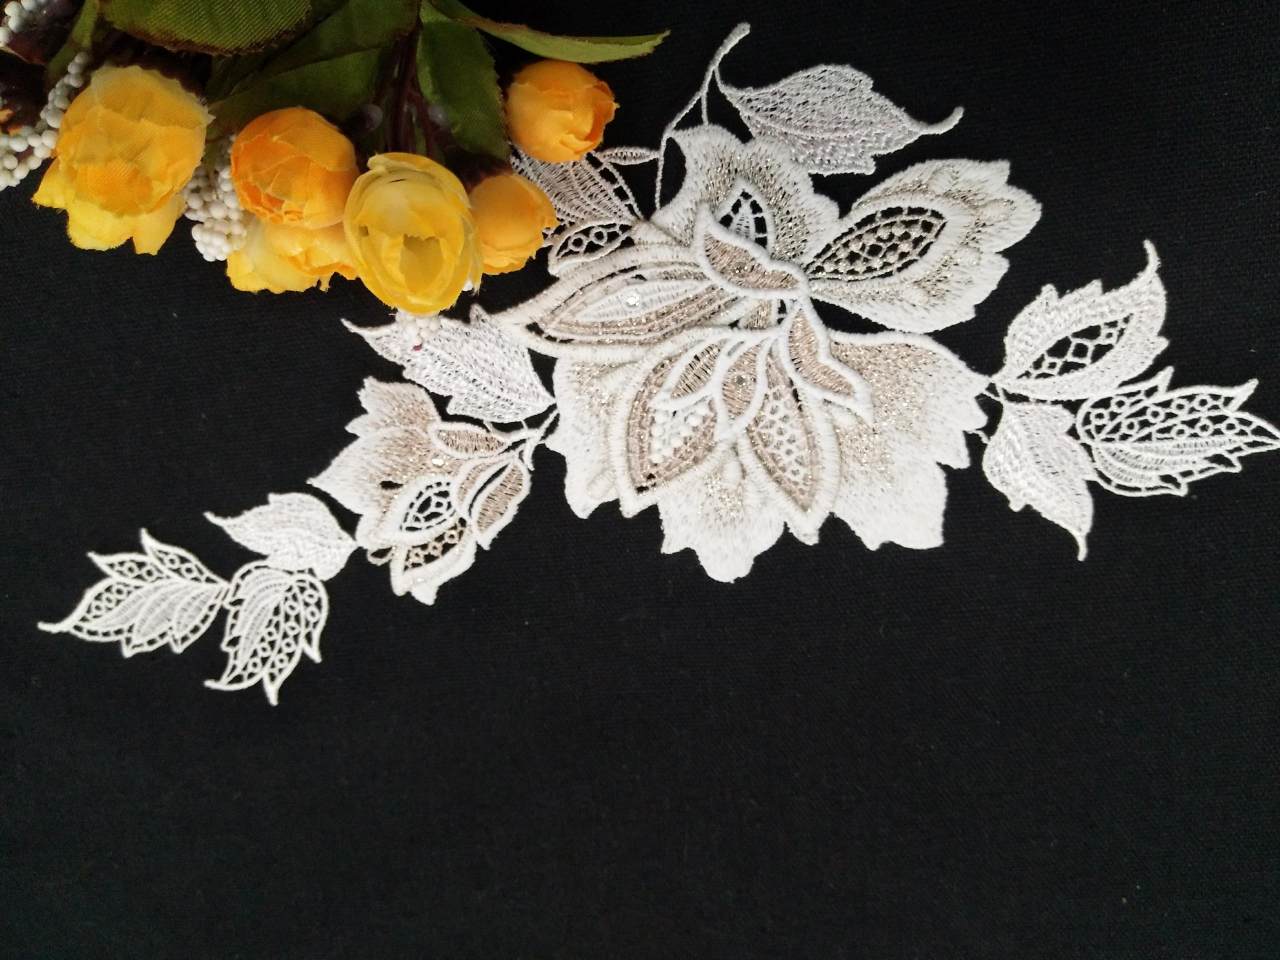
Step 2: The Design
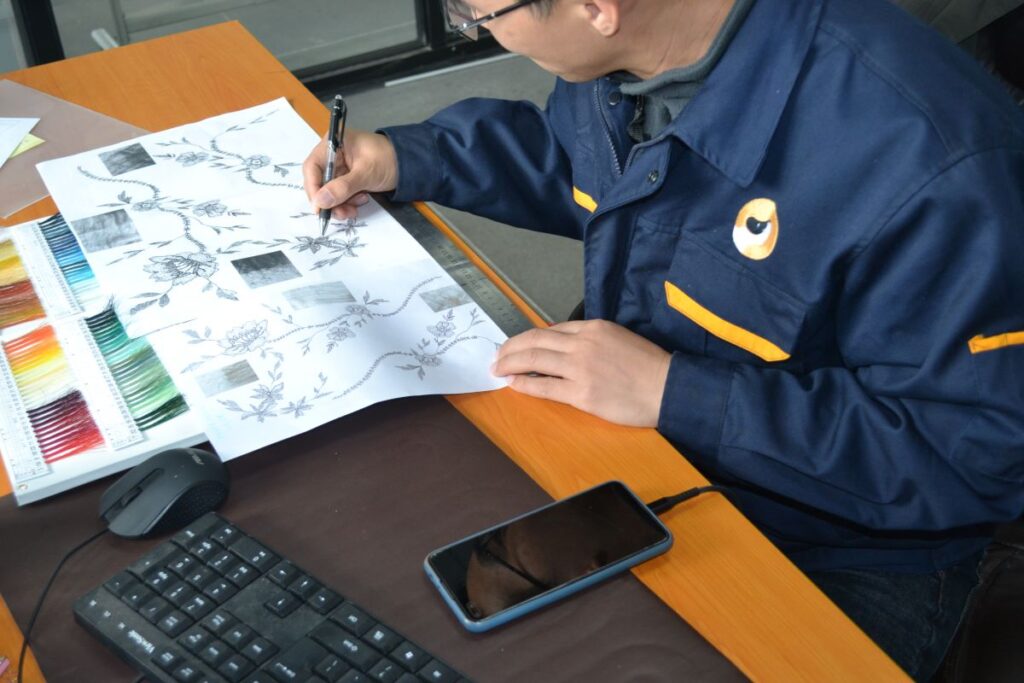
The design phase – this is where the journey of an embroidery piece truly begins. An idea, a fleeting spark of inspiration, slowly shapes into a tangible design, a veritable blueprint for the embroidery to come. As we embark on this exciting phase, let’s immerse ourselves into the depths of the design process in embroidery.
Conceptualization – The Birth of an Idea:
The first step in the design process is conceptualization. It’s about translating the nebulous realm of inspiration into concrete ideas. This could be a pattern, a figure, an abstract concept, or even a scene from nature. It’s about visualizing how different elements can come together to create a compelling visual narrative.
Staff design lace drawings based on customer inspiration, select yarn size, composition, color and other reference data.
Sketching – Crafting the First Draft:
Once the idea has been conceptualized, the next step is to sketch it. It’s a crucial phase that forms the skeletal structure of the design. Sketching allows the artist to experiment with the composition, proportions, and positioning of elements. It’s an iterative process where ideas evolve, and the design takes its first breath of life.
Detailing – The Heart of Design:
Once the sketch is finalized, it’s time to dive into detailing. The beauty of embroidery lies in its intricate details – the mix of stitches, the interplay of colors, the textures, and the patterns. The artist decides on the types of stitches that would best bring out the design elements, whether it be satin, chain, or cross-stitch. The color palette is chosen to complement the design and evoke the intended emotions. Each element is meticulously crafted to ensure harmony and balance within the design.
From initial conception to final realization, the process of embroidery design is a blend of creativity, precision, and technological intervention. It all begins with the staff creating sketches. These hand-drawn illustrations capture the essence of the design, from intricate patterns to sweeping motifs. However, these physical sketches need to be converted into a format that can be understood by the modern embroidery machines, and this is where technology steps in.
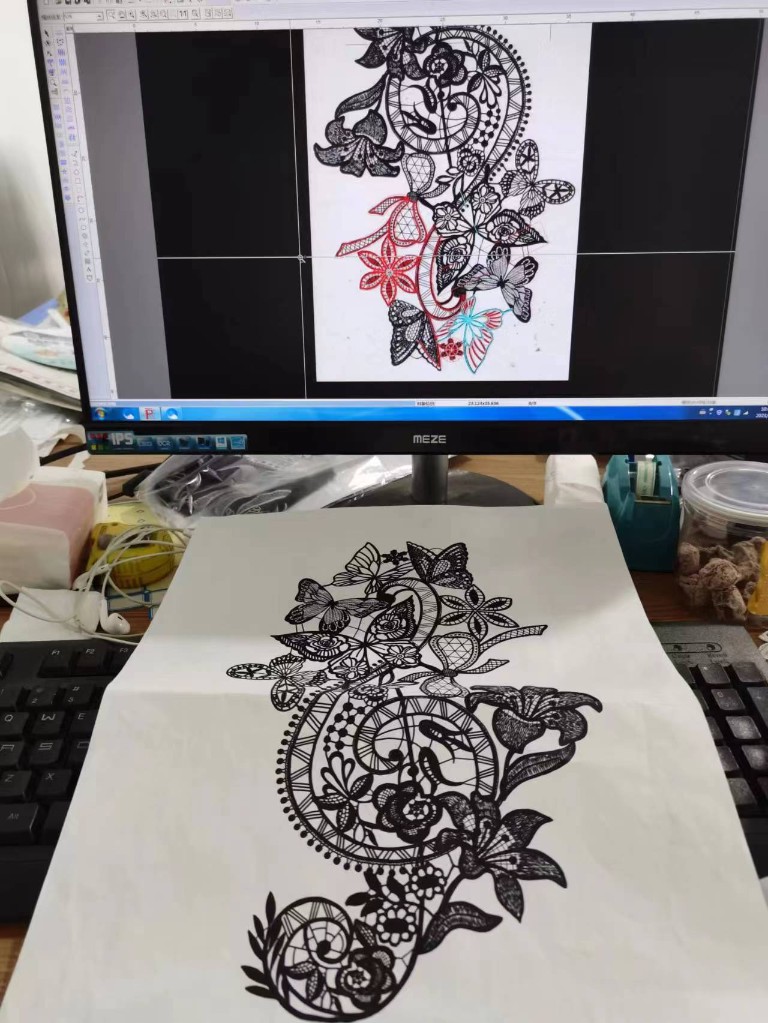
Digitizing – The Bridge to Reality:
The completed design is then digitized using specialized software. This step involves converting the design into a series of instructions that an embroidery machine can follow. It plots out the exact sequence, type, and direction of each stitch. The software also helps simulate different thread colors, giving a realistic preview of the final piece.
Refining and Finalizing – The Finishing Touches:
Lastly, the design is refined and finalized. It’s an opportunity to take a step back and view the design from a fresh perspective. The artist evaluates the design for aesthetic appeal, balance, and impact. Any required adjustments are made, and the design is fine-tuned to perfection.
In essence, the design process in embroidery is a dance between creativity and technical precision. It’s about painting a picture with threads, creating a tapestry of colors and textures that tell a story. It’s the phase where ideas take form, and dreams are woven into reality. It’s the heart and soul of every embroidery piece – the design is truly where the magic begins!
Step 3: Digitization
Embroidery Digitizing – an intriguing phase in the embroidery process that bridges the gap between artistic design and mechanized production. It’s where technology meets creativity, translating a beautifully crafted design into a language the embroidery machine can understand. Let’s delve deeper into this vital stage, unweaving the threads of the embroidery digitization process.
The sketches are scanned into the computer using high-resolution scanners. This digital transformation allows the design to be further enhanced and fine-tuned. Using specialized software, the staff can work on the scanned drawings, adding details, correcting any imperfections, and adjusting dimensions as required.
Unraveling Digitization: What Does it Mean?
Embroidery digitization is the transformation of a two-dimensional artwork into a stitch file that an embroidery machine can interpret. This file dictates every single detail of the embroidery process – the types of stitches to be used, the sequence of stitching, the thread color changes, and even the speed and direction of the stitches.
Digitization Software: The Master Key
The central tool in the digitization process is the digitization software. This software allows the digitizer to input the design and specify the details like stitch types (such as fill, satin, or run stitches), stitch directions, stitch density, and thread color sequences. The software then creates a digital stitch file that brings the design to life, stitch by stitch.
From Pixels to Stitches: The Transformation
The transformation begins with the import of the design image into the digitizing software. The digitizer then uses the software tools to outline each area of the design where stitches will be applied, effectively converting the design details into stitches. The pathing of the design is planned to determine the sequence of stitches, optimizing the design to minimize thread trims and jumps, thus ensuring efficiency and high-quality results.
Testing and Refining: The Crucial Steps
Once the digitizing process is complete, a test run is crucial to ensure that the embroidery comes out as desired. It’s an opportunity to refine the design – adjust stitch densities, alter stitch directions, and fix any potential thread break areas. This test run helps ensure that the embroidery machine accurately and effectively brings the design to life.
In essence, embroidery digitization is an amalgamation of artistic understanding and technical skills. It’s the pivotal phase that turns a creative concept into an executable embroidery pattern. It’s a complex process, but when done right, it can transform a piece of fabric into a captivating artwork, each stitch a testament to the harmony of design and technology. Through digitization, the beauty of art and the precision of machinery intertwine, creating the spellbinding craft we know as embroidery.
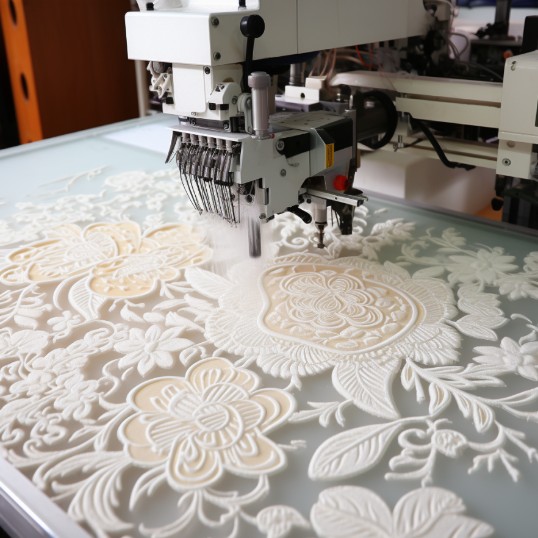
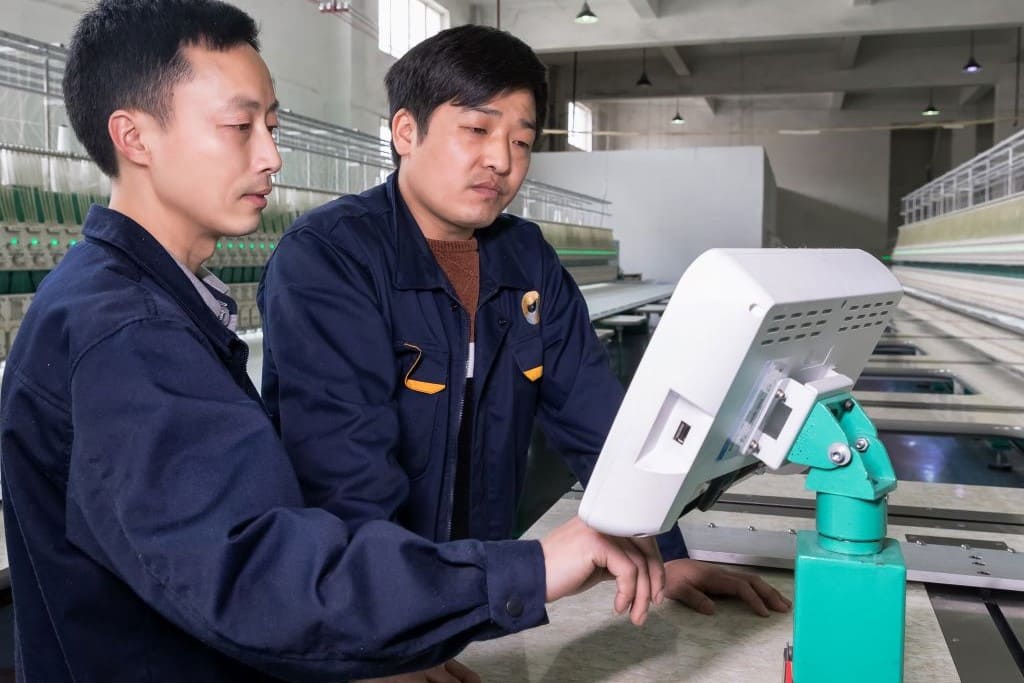
Step 4: Setting up the Machine
The setting up of an embroidery machine – a vital step where the marvels of technology embrace the whims of creativity. As the digitized design prepares to leap onto the fabric, stitch by stitch, the embroidery machine becomes the craftsman’s canvas. Let’s explore this fascinating phase in the journey of an embroidery design from digital conception to tactile reality.
Upon completion of this process, the machines take over. They interpret the digitized design and execute the embroidery production. This synergy between human creativity and machine precision results in high-quality, repeatable, and scalable embroidery production. It’s this blend of art and technology that has taken the age-old craft of embroidery to new heights in the modern era.
Importing the Design:
With the digitized design in hand, the first step is to import this blueprint into the embroidery machine. This is often accomplished through a direct computer connection or via USB devices. The transferred design is then displayed on the machine’s screen, allowing the operator to verify and select it for embroidery.
Configuring the Machine Settings:
Once the design is loaded, the next step is configuring the machine settings. This includes setting the appropriate speed, tension, and thread path. Each of these parameters plays a crucial role in ensuring the highest quality embroidery.
Thread Selection and Loading:
The choice of thread color and type is integral to the final outcome. Using the color sequence specified during digitization, the operator selects the threads and loads them into the machine. The types of thread (such as cotton, polyester, or rayon) are chosen based on the design and fabric requirements.
Hoop Placement and Fabric Alignment:
The fabric is then carefully positioned and clamped tightly using an embroidery hoop. This process ensures the fabric remains stable and taut during the embroidery process. Precise alignment is critical here, as even slight misalignments can lead to distortions in the final design.
Running a Test Stitch-Out:
Before the full-scale production, a test stitch-out is performed. This provides an opportunity to verify the design’s alignment, the thread colors, the stitch quality, and the overall aesthetic appeal. Any necessary adjustments can be made at this stage.
Embroidery Production – Let the Machine Work Its Magic:
With all parameters in place, it’s time for the machine to bring the design to life. The operator starts the machine, and it begins the mesmerizing process of tracing out the design on the fabric, stitch by stitch, color by color. As the needle moves rhythmically, a beautiful dance ensues, creating a masterpiece that was once just a digital concept.
This involves converting the design into a stitch file, which instructs the machine where, how, and in what sequence to place each stitch. With advanced software and high precision machinery, this process can be carried out with incredible accuracy.
In essence, setting up the embroidery machine is a blend of technical acumen and keen attention to detail. It requires understanding the machine’s capabilities, the interplay between different materials, and the nuances of the design. It’s in this phase that the design breathes life into the fabric, stitch by stitch, transcending the realms of technology and creativity, resulting in a tangible piece of art.
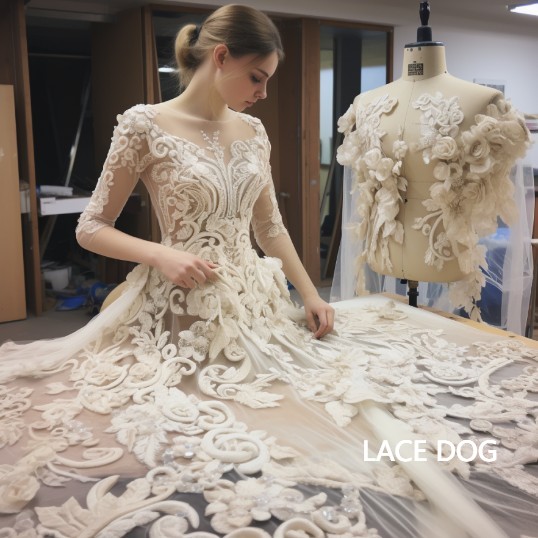
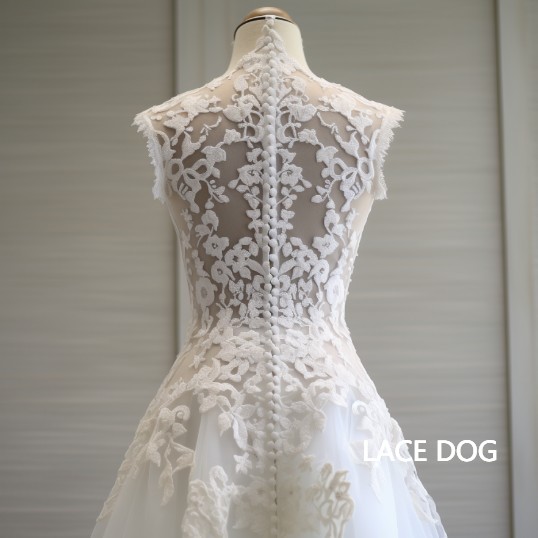
Step 5: The Finishing Touches
The embroidery machine halts. The last stitch is in place. The fabric emerges adorned with vibrant threads, woven into a design that reflects creativity, skill, and passion. But hold on, the journey isn’t over yet. There’s one more crucial phase – the finishing touches. Let’s explore the final stages that elevate an embroidered piece from merely beautiful to truly exquisite.
Finished product inspection is a critical stage in embroidery production. It ensures each piece meets design and quality standards. Inspectors examine color consistency, stitch density, and pattern alignment. Misalignments or color variations are flagged. This meticulous process guarantees only top-quality embroidery reaches customers.
Quality Inspection – Ensuring Perfection:
Quality is paramount in embroidery. Every piece that emerges from the machine undergoes a thorough inspection to ensure the highest standards. The inspecting artist scrutinizes each detail – the integrity of the stitches, the precision of the design, the consistency of colors, looking for any discrepancies or errors. This painstaking review ensures that the embroidery is nothing short of perfect, just as the designer envisioned it.
Trimming – A Cut Above the Rest:
Following inspection, the embroidery moves to the trimming stage. This process involves carefully cutting away the excess thread jumps and backing material. It’s a delicate process that requires a steady hand and keen eye for detail. Trimming doesn’t just clean up the design but also enhances its overall aesthetic appeal, making it ready for the world to admire.
Washing and Drying – Unveiling the True Colors:
Embroidery often goes through a washing and drying process, particularly if soluble stabilizers were used during stitching. Washing helps in removing any remaining stabilizer, dirt, or hoop marks, revealing the design’s true colors and texture. Post-washing, the fabric is gently dried, preserving the integrity of the design.
Pressing – The Final Seal of Excellence:
The last step in the process is pressing or ironing the fabric. This not only smooths out any wrinkles but also helps ‘set’ the embroidery, giving the piece a professional finish. The embroidery should be ironed from the reverse side, using a pressing cloth to protect the threads.
The finishing phase is a testament to the attention to detail and commitment to perfection that lies at the heart of embroidery. It’s the final polish that perfects the blend of artistry and craftsmanship, and ultimately, it’s what takes the design from the confines of the studio to the glamour of the catwalk, the coziness of your living room, or the sophistication of a business logo.
This stage concludes the fascinating journey of an embroidery piece, a journey that sees creativity, technology, and craftsmanship intersect. Each step, from the spark of inspiration to the final finishing touch, is a blend of tradition and innovation, all stitched together to produce a unique work of art. It’s the harmonious dance of the mind’s creative whispers and the hands’ skilled execution, resulting in a masterpiece that’s ready to adorn the world.
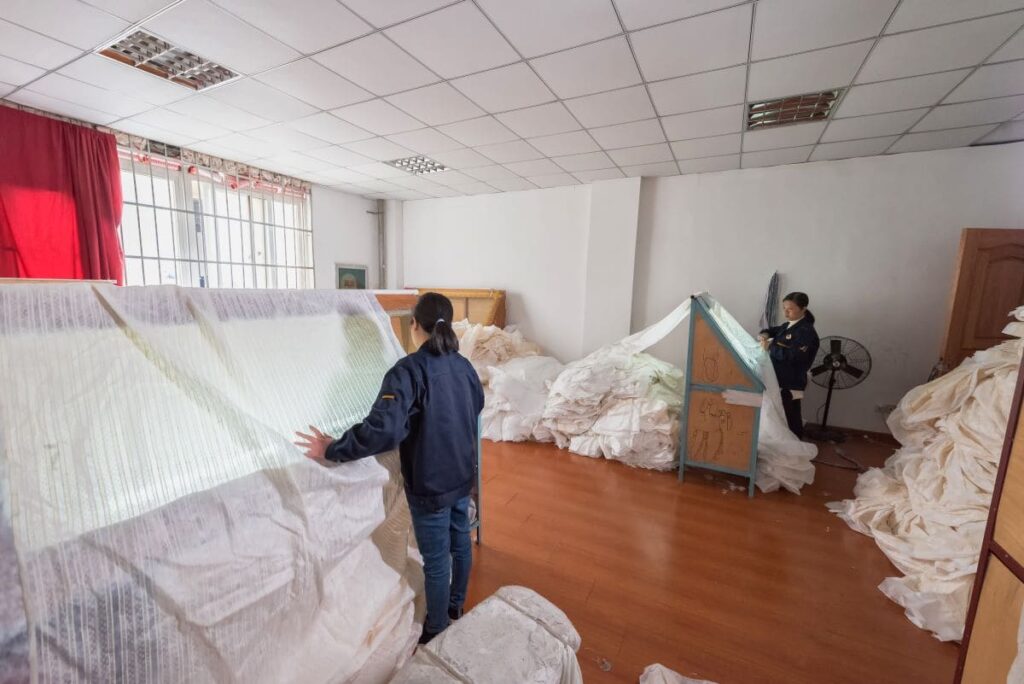
Step6、Dyeing and shaping
The trimmed embroidery lace fabric will be taken to dyeing factory for water soluble, hot melt and dyeing. When you choose water-soluble paper, the water-soluble paper should be dehydrated to prepare for shaping, and the shaping machine that can add softener is not necessary for dehydration. When shaping, make sure to control the temperature and speed of the shaping machine. Too high temperature will make the cotton thread discolored and brittle, and the tension of the setting machine should be controlled to avoid holes. When setting the net cloth, the speed should not be too fast, otherwise it is easy to appear ear edge, the door width can not be set dead and other phenomena.


Step7、Inspection and finishing of shipments
The last process after shaping is to pull the fabric from the shaping factory back to the embroidery factory for re-inspection before packing and shipping.
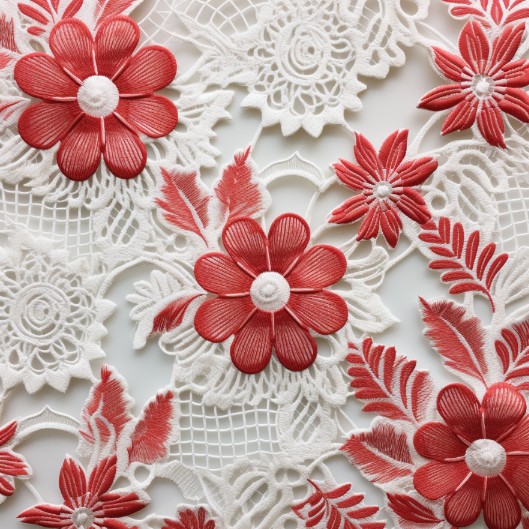
This is the whole process of the birth of embroidered lace, and the next thing you’ll see is a beautiful variety of embroidered products!
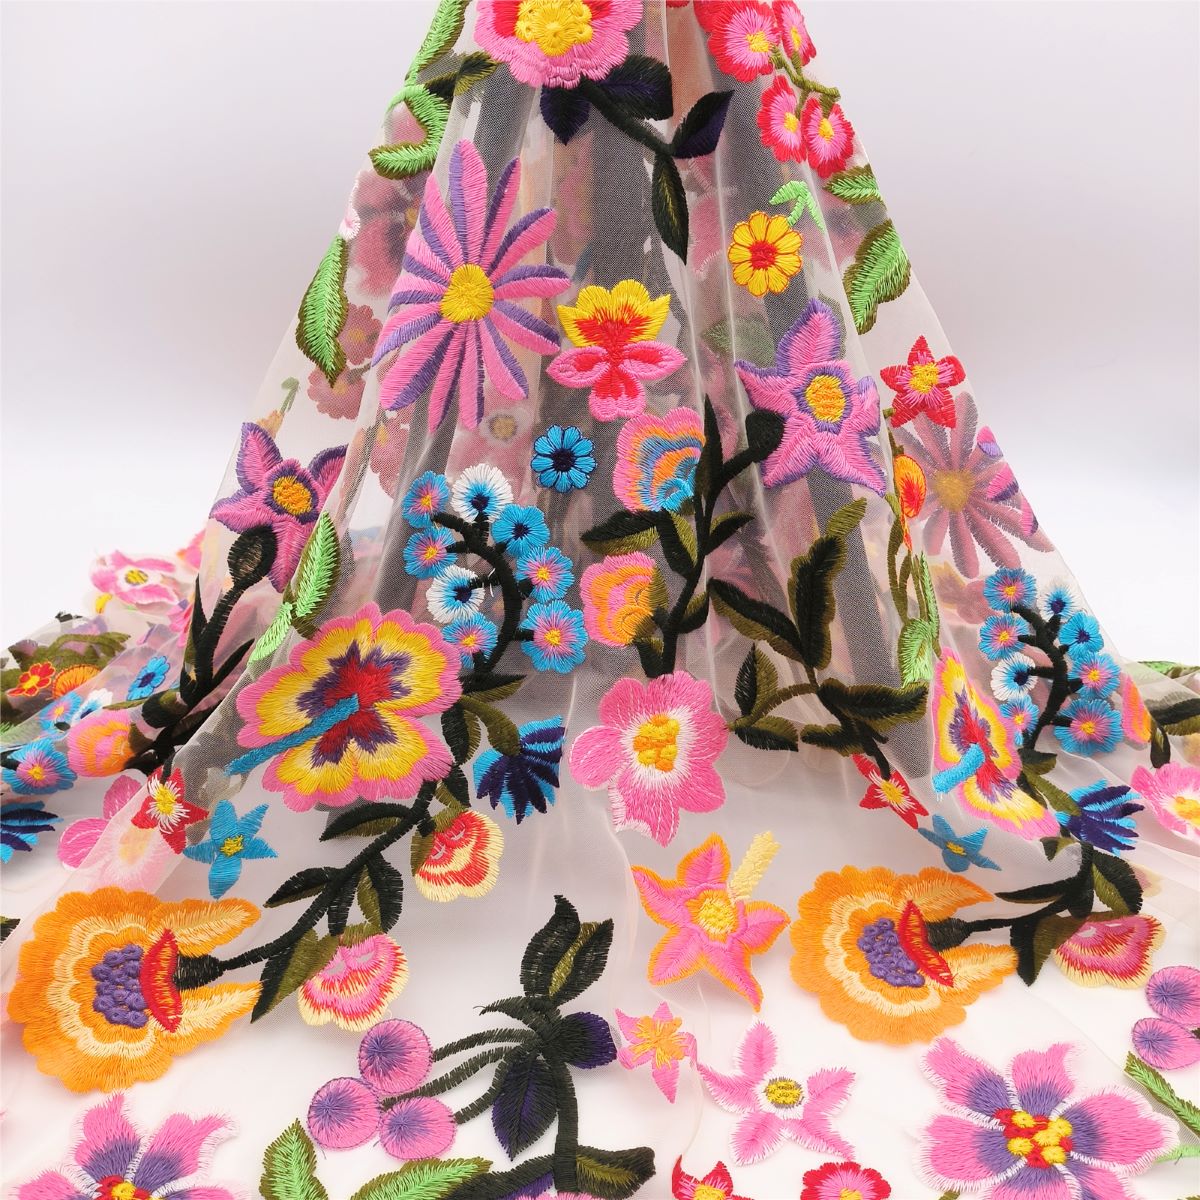


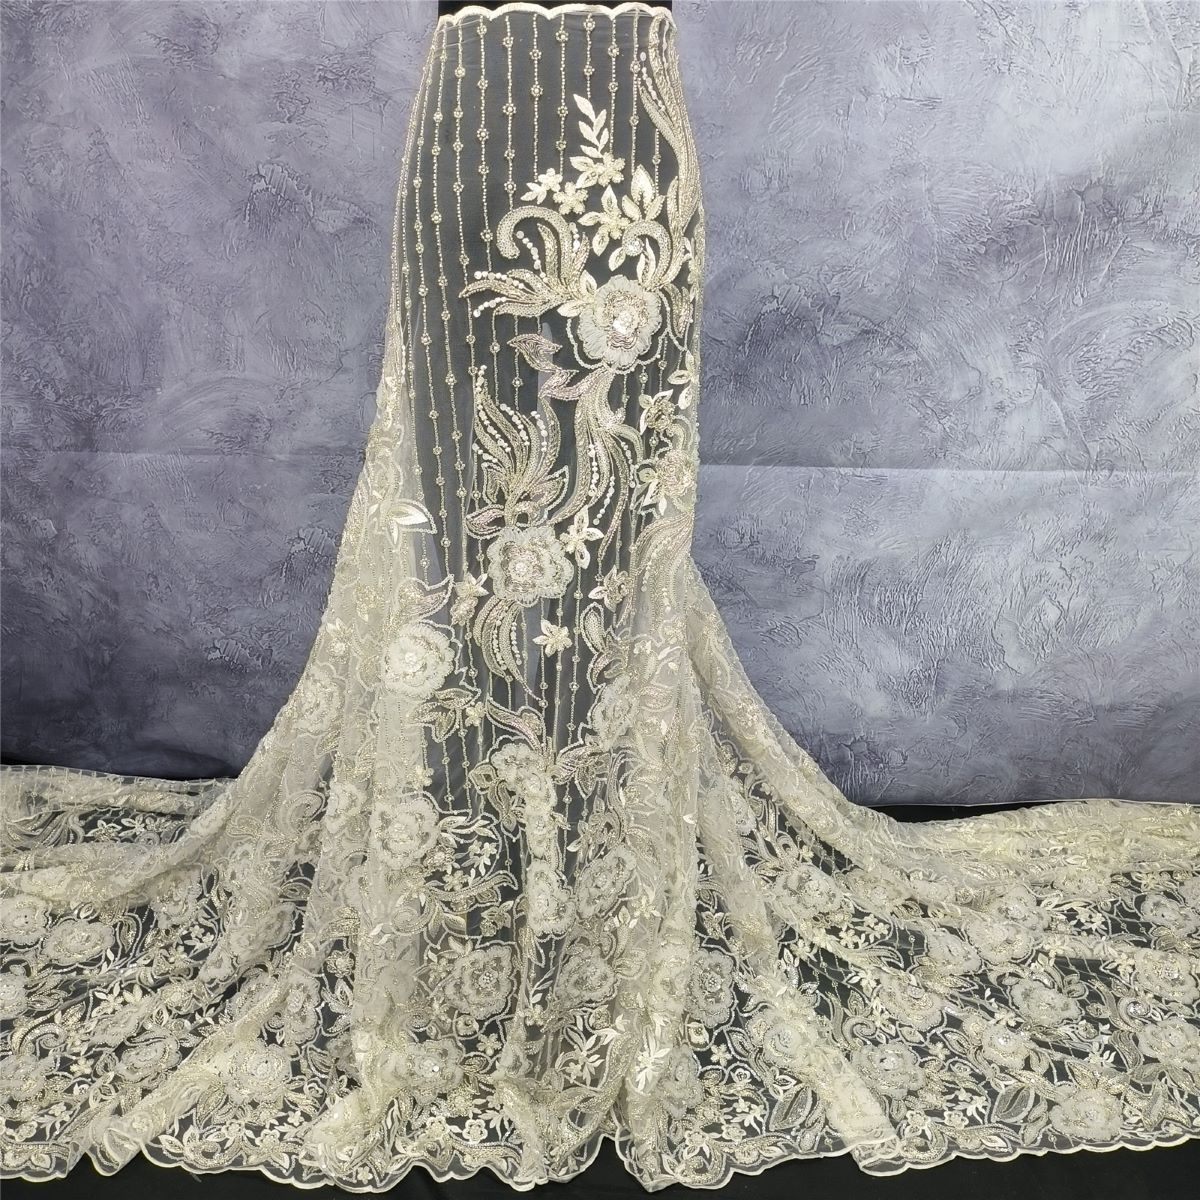
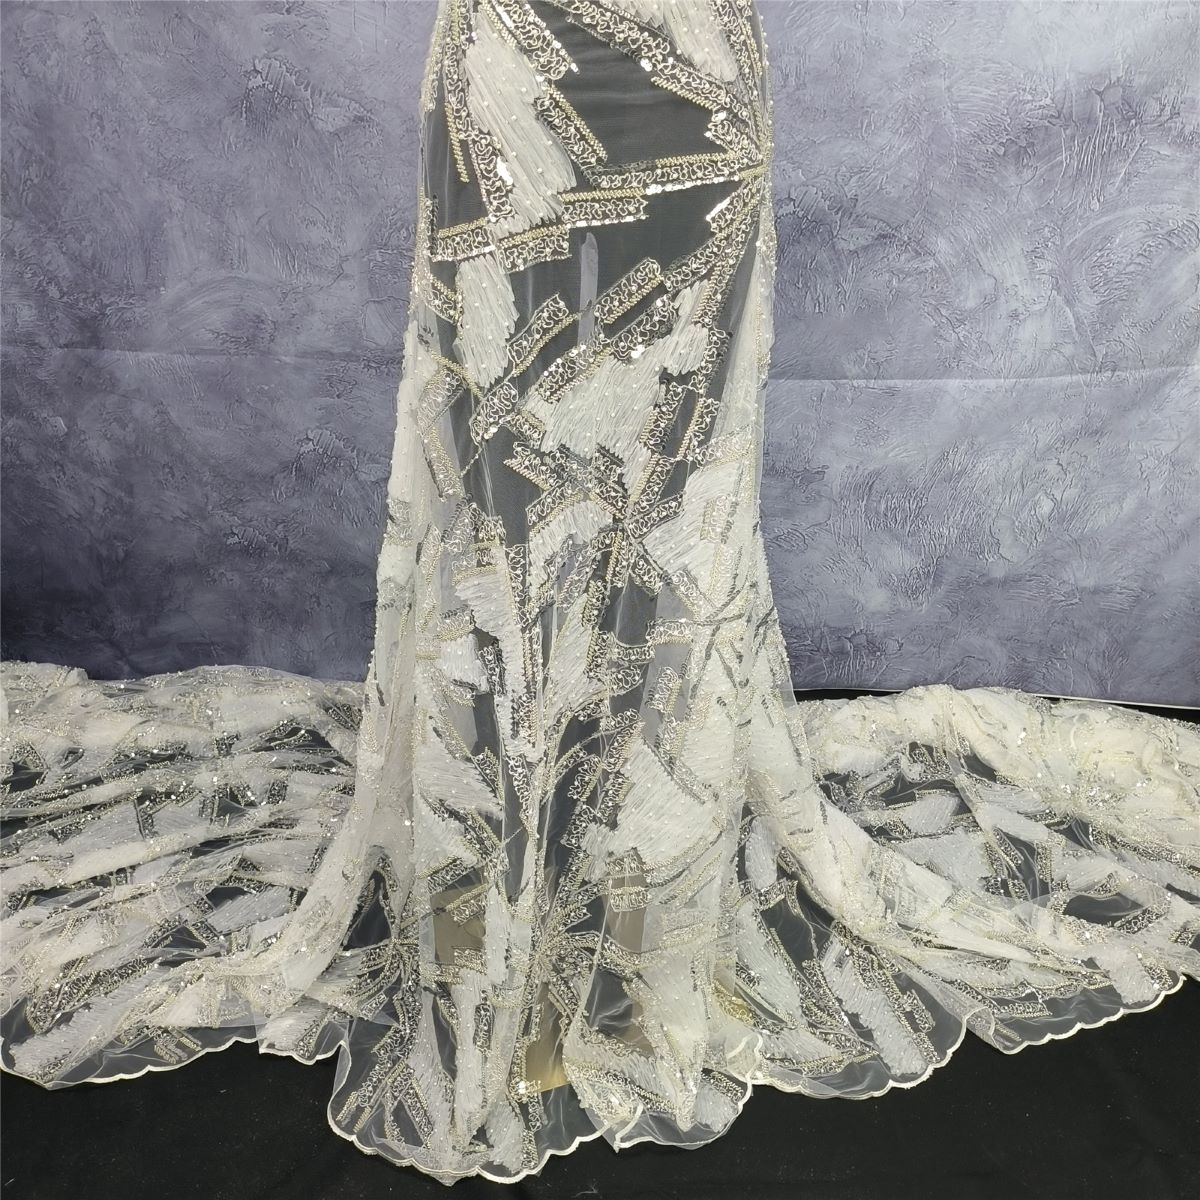

Embroidery is the most widely used and loved textile of all lace categories, with the most variations, and it is difficult to see the beauty she gives us in every corner of the world, allowing everyone to show their hidden inner thoughts in their own way.
FAQs:
- Q: What is embroidered lace? A: Embroidered lace is a type of lace where patterns are created by applying thread onto a fabric base, often netting, via an embroidery technique.
- Q: How is the design for embroidered lace created? A: The design is initially conceptualized and sketched by an artist. It is then digitized using special software to create a design file that the embroidery machine can understand.
- Q: What software is used for digitizing embroidery designs? A: There are several software options available, such as Wilcom, Brother PE Design, and Embird. The choice depends on the specific features required and budget considerations.
- Q: Can any fabric be used as a base for embroidered lace? A: While technically you could embroider on many types of fabric, traditionally, lightweight, transparent fabrics like tulle, organza, or netting are used for embroidered lace.
- Q: What types of threads are used in embroidered lace? A: The choice of thread depends on the desired effect. Rayon and polyester threads are commonly used due to their sheen and durability. Metallic threads may be used for special effects.
- Q: How long does it take to produce embroidered lace? A: The production time depends on several factors such as the complexity of the design, the size of the piece, and the speed of the embroidery machine.
- Q: Can embroidered lace be washed? A: Yes, most embroidered lace can be washed. However, it’s recommended to hand wash or use a gentle cycle to preserve the delicate embroidery. Always check the care instructions.
- Q: Can the color of the embroidered lace fade? A: If high-quality threads are used, the colors should not fade. However, constant exposure to sunlight or frequent washing can potentially lead to some color fading.
- Q: What is the ‘hoop’ in the context of embroidery? A: A hoop is a tool that clamps the fabric taut while it is being embroidered. This helps ensure accuracy and precision.
- Q: What is a ‘stabilizer’ in embroidery? A: A stabilizer is a material used to support the fabric during the embroidery process. It helps to prevent puckering and distortion.
- Q: How are mistakes corrected during the embroidery process? A: Minor mistakes can be corrected by carefully removing the incorrect stitches and re-doing them. Major mistakes might require starting over.
- Q: Why is a test run important in the embroidery process? A: A test run is crucial to ensure that the design stitches out correctly and looks good on the chosen fabric. It helps identify and rectify any issues before the final production.
- Q: What is a ‘thread break’ in embroidery? A: A thread break occurs when the thread snaps during the embroidery process. This can be due to various reasons like incorrect tension, a damaged needle, or poor-quality thread.
- Q: What happens if the embroidery machine malfunctions during production? A: If the machine malfunctions, it should be stopped immediately to prevent damage to the fabric or the machine itself. The issue should then be identified and resolved before resuming.
- Q: How can one ensure consistent quality in embroidered lace production? A: Quality can be maintained by using high-quality materials, keeping the machinery in good working order, performing regular quality checks, and training operators effectively.
- Q: Can embroidered lace designs be customized? A: Absolutely! Designs can be customized based on client requirements, including specific patterns, colors, and size.
- Q: What factors affect the cost of embroidered lace production? A: The cost can depend on factors such as the complexity of the design, the type and quantity of materials used, and the time taken for production.
- Q: How are the finishing touches added to embroidered lace? A: Finishing touches may include quality inspection, trimming excess threads, washing and drying to remove any marks or stabilizers, and pressing to give the fabric a smooth finish.
- Q: Can embroidered lace be produced on a large scale? A: Yes, with the help of advanced embroidery machines and skilled operators, embroidered lace can be produced on a large scale.
- Q: Can I produce embroidered lace at home? A: Yes, with the right equipment like an embroidery machine and digitizing software, and with some practice, you can produce embroidered lace at home.